> For the complete documentation index, see [llms.txt](https://docs.kuasa.io/llms.txt). Markdown versions of documentation pages are available by appending `.md` to page URLs; this page is available as [Markdown](https://docs.kuasa.io/start-selling/stripe.md).
# Stripe
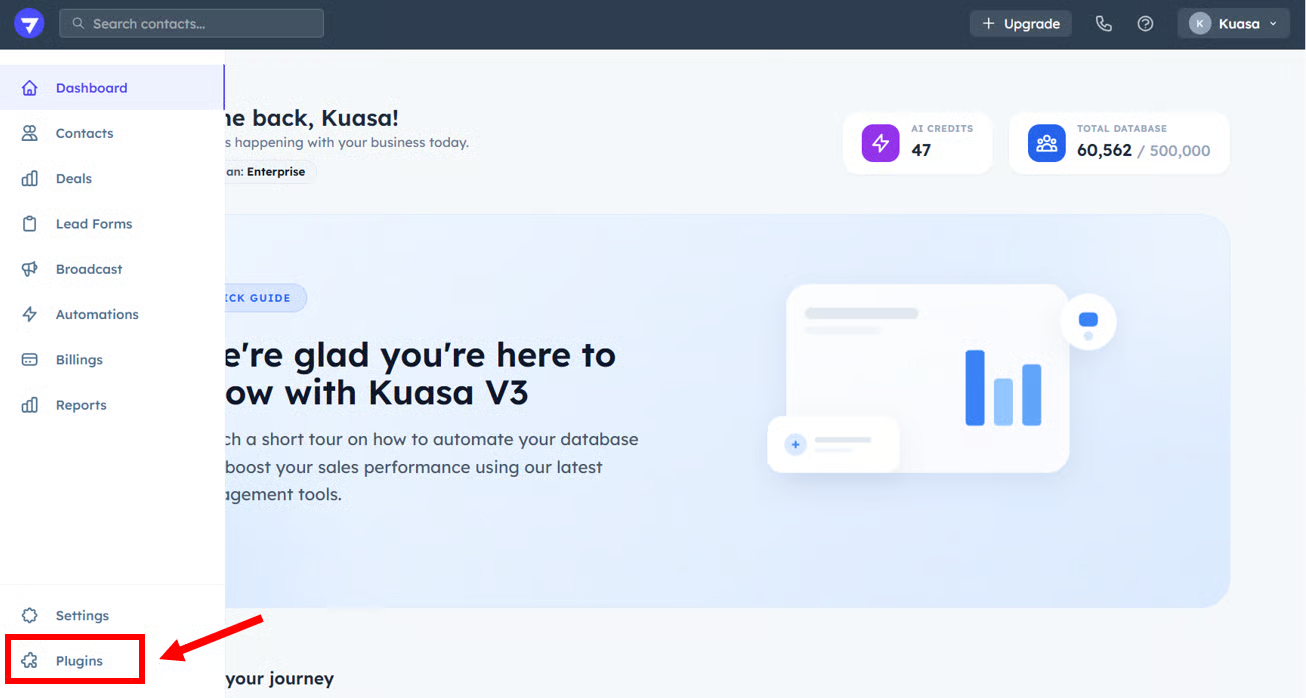
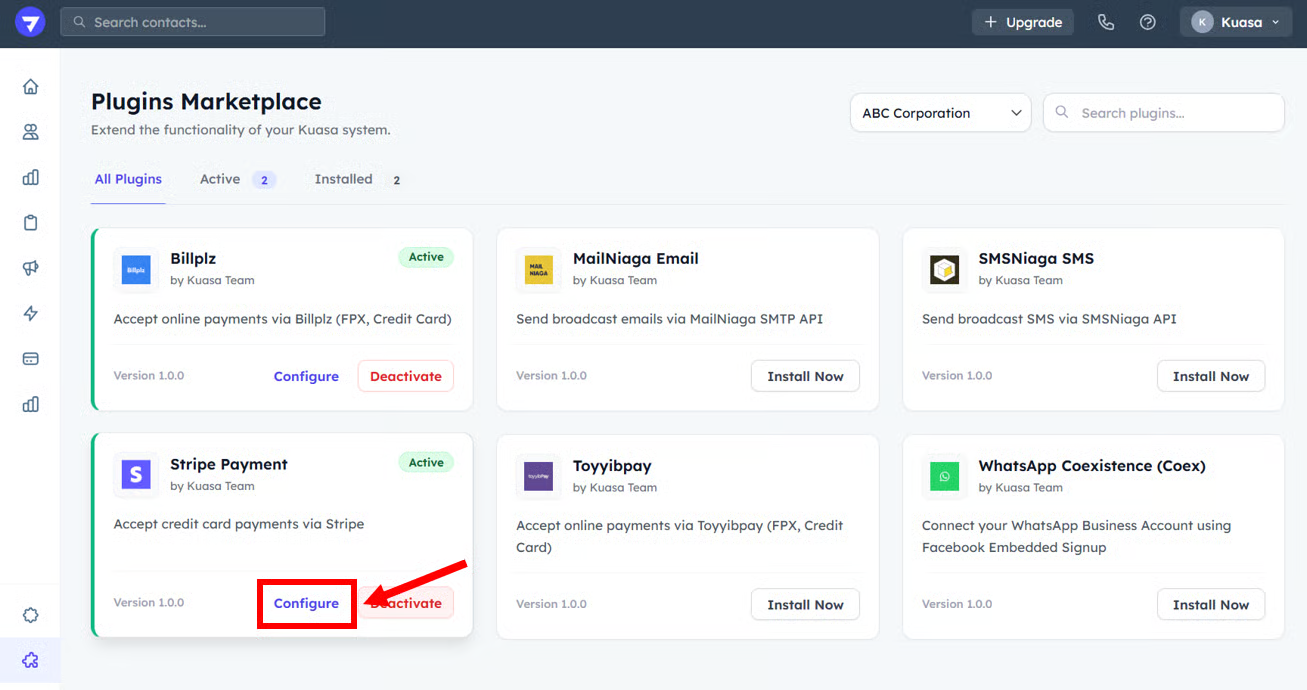
1. Click **Plugins**.
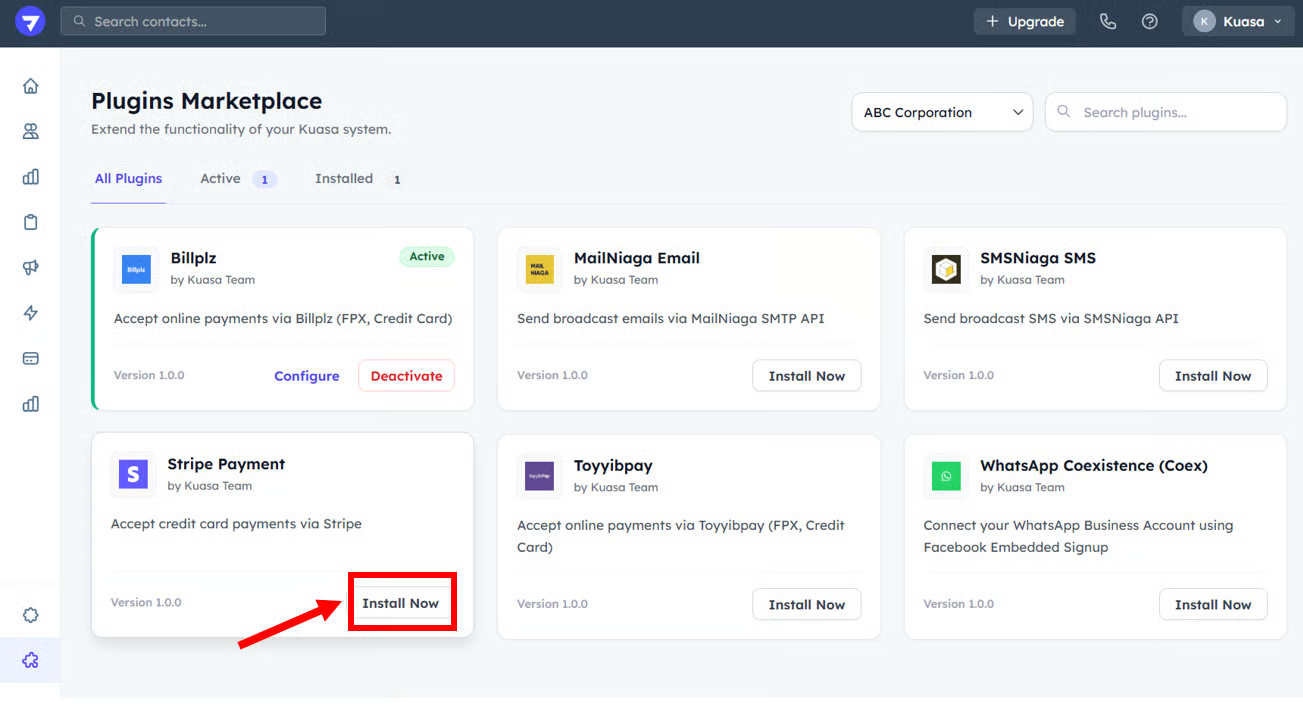
2. Click **Install Now** on **Billplz**.
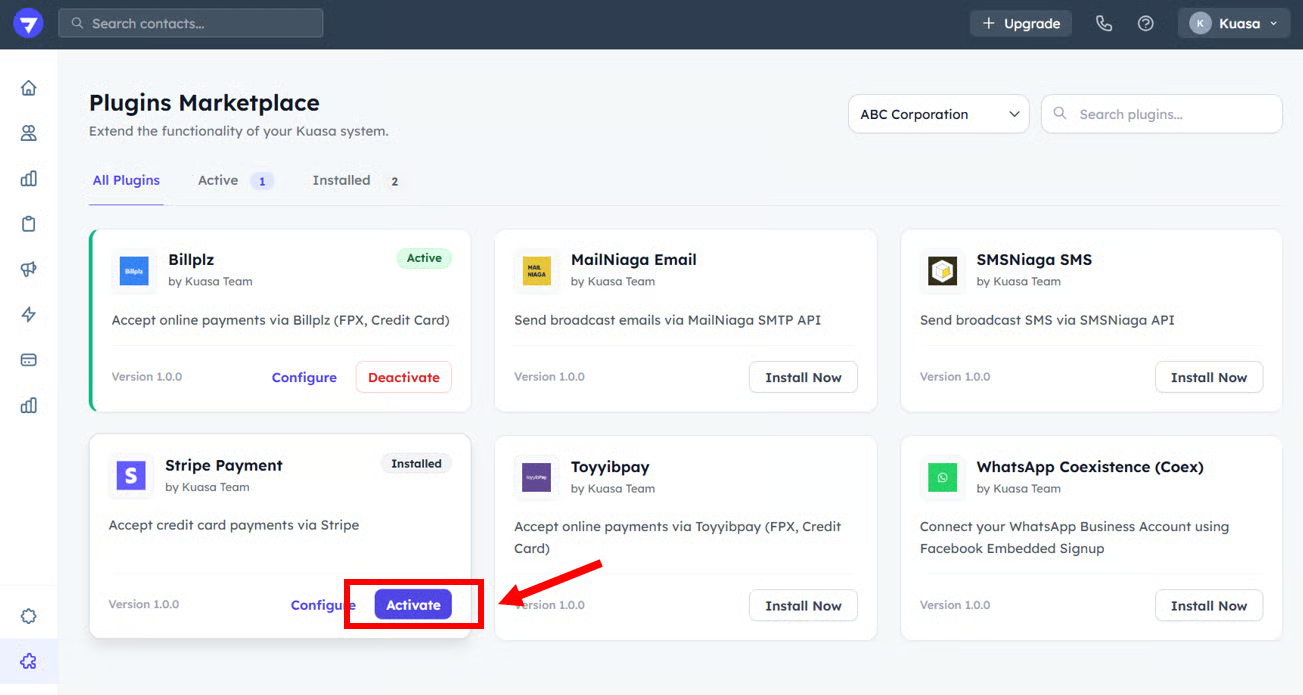
3. After the plugin already installed, click **Activate**.
4. Click **Configure**.
5. Click **Configure**.
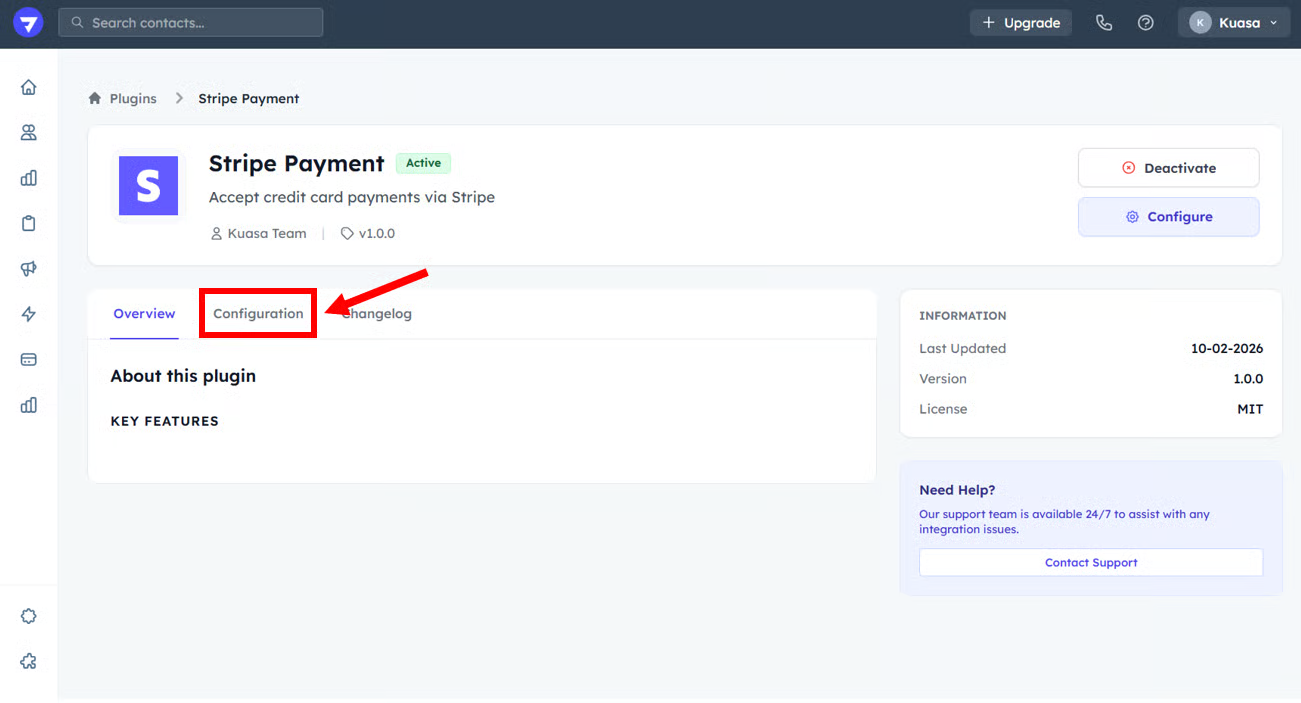
6. Go to **Configuration**.
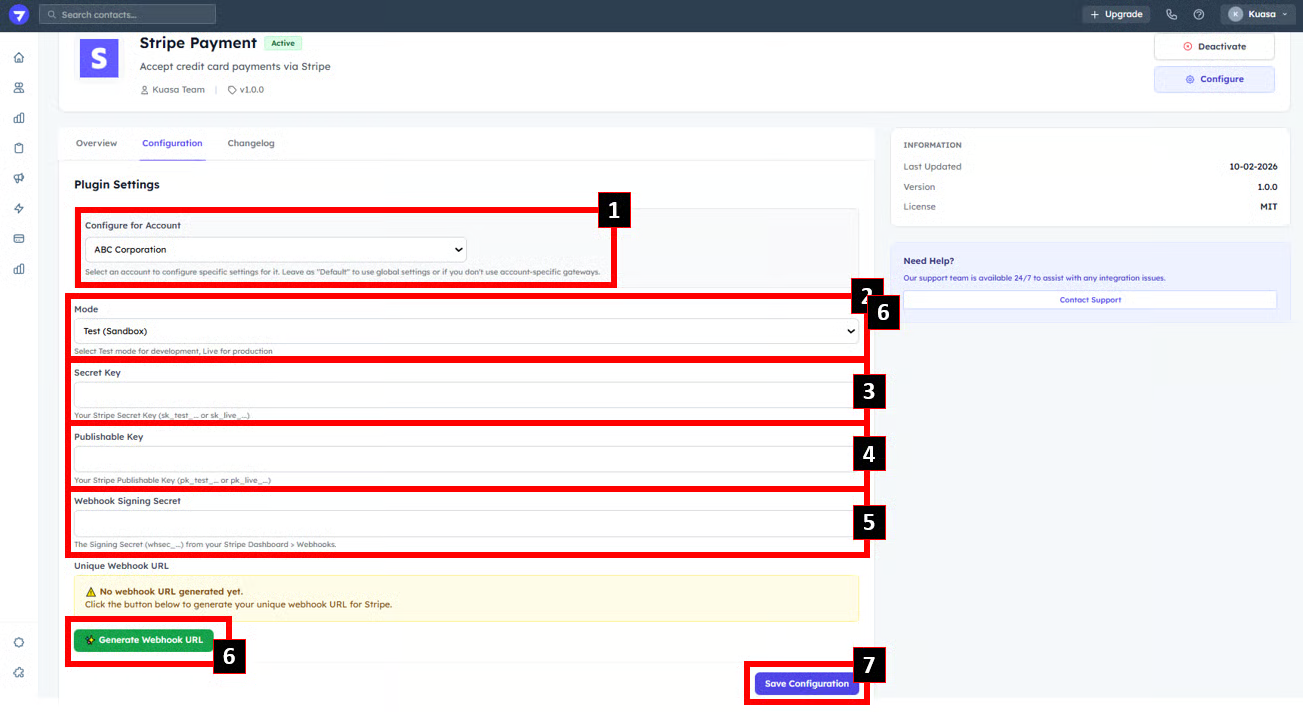
7. Choose the Client Account. Then, enter all the details below (get the details from your payment gateway account):
* Set the Mode: Test (Sandbox)
* Enter: **Secret Key**
* Enter: **Publishable Key**
* Enter: **Webhook Signing Secret**
* Click **Generate Webhook URL**
{% hint style="info" %}
After complete fill up all the details, click **Save Configuration**.
{% endhint %}
{% hint style="success" %}
Well Done! You already complete payment gateway plugin setup.
{% endhint %}