> For the complete documentation index, see [llms.txt](https://docs.kuasa.io/llms.txt). Markdown versions of documentation pages are available by appending `.md` to page URLs; this page is available as [Markdown](https://docs.kuasa.io/reach-customers/setup-email-plugin.md).
# Setup Email Plugin
You need to register MailNiaga Email account before proceeding with below steps. To register, you may click link below.
#### SMTP MailNiaga Email Account Registration
1. Click link below to register.
{% embed url="" %}
2. Click **Continue** for SMTP Account Setup & Registration to proceed with the account registration.
{% hint style="warning" %}
RM50 setup fee will be charged by MailNiaga Email for the registration
{% endhint %}
3. Click **Continue**.
4. Enter all the details required.
5. Verify the image and select payment method. Then, click **Continue** to proceed with the payment.
#### Login to Kuasa account to setup MailNiaga Email plugin.
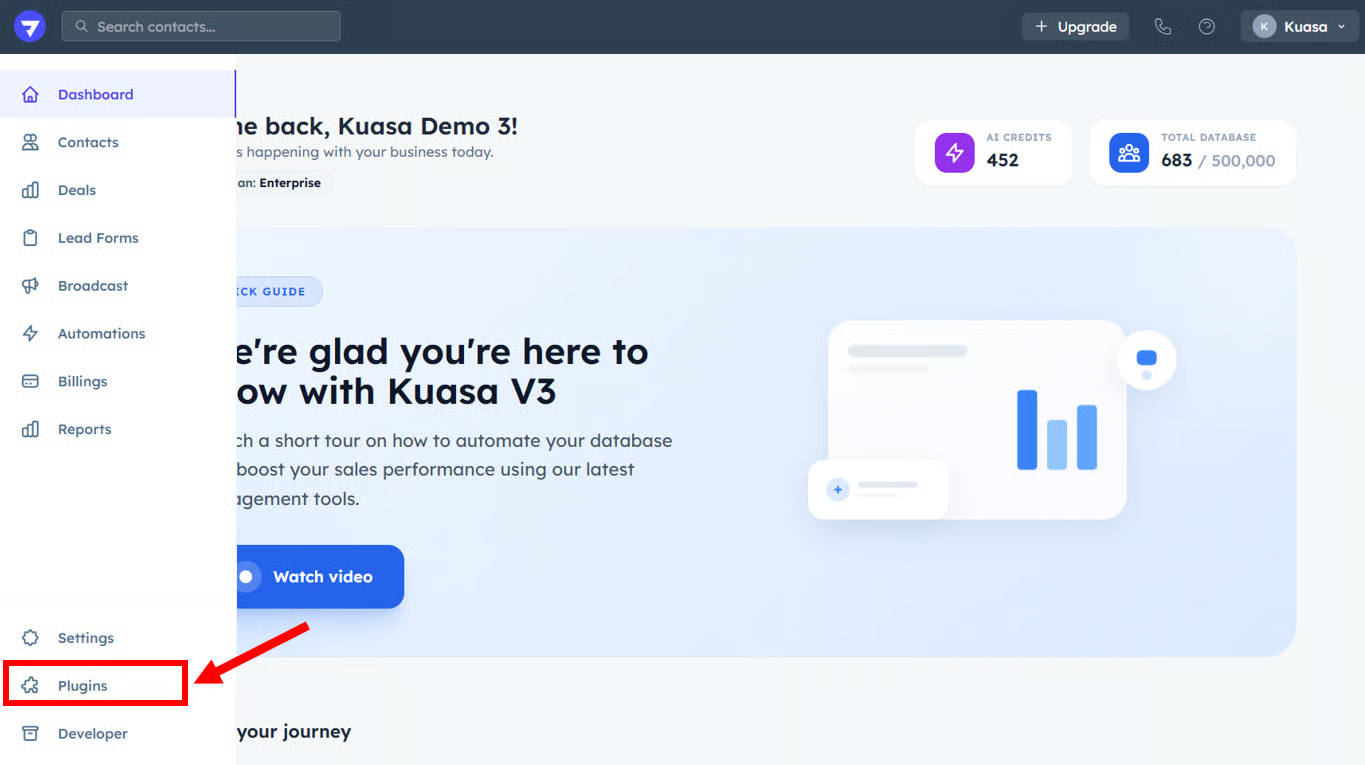
1. Click **Plugins**.
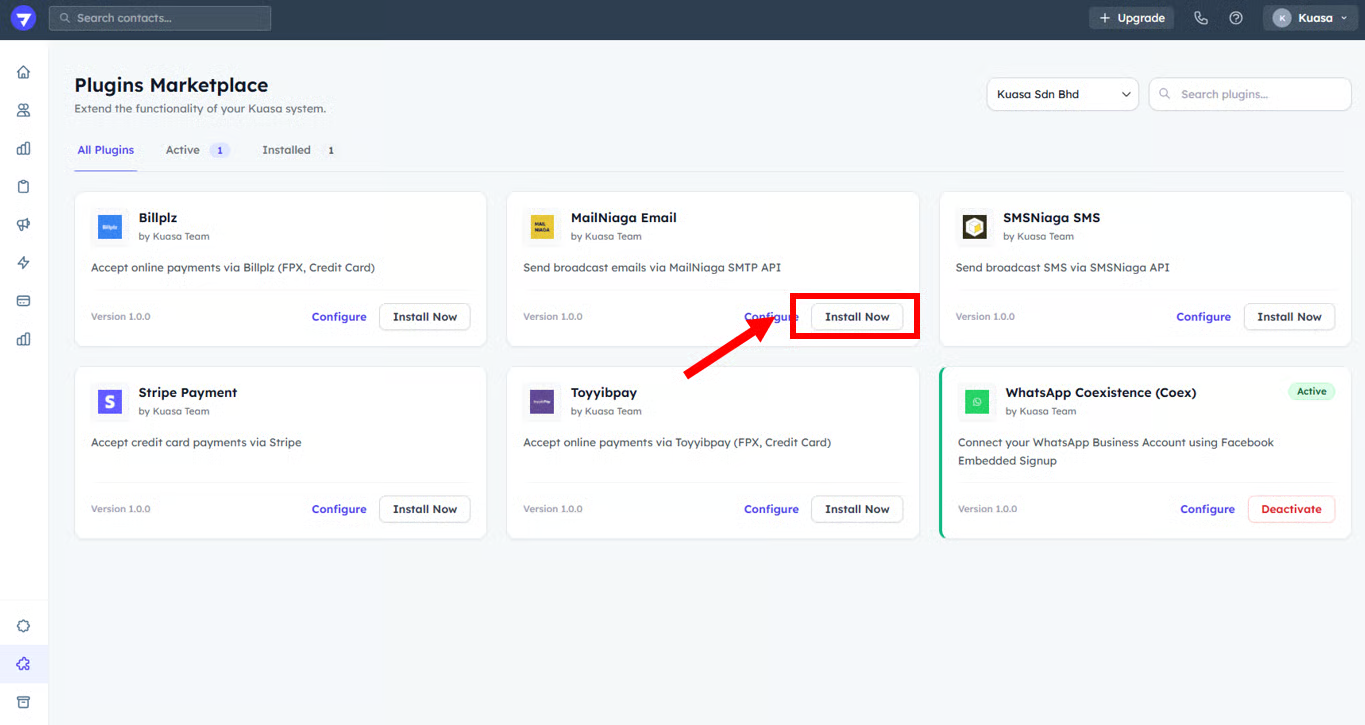
2. Go to **MailNiaga Email**.
3. Click **Install Now**.
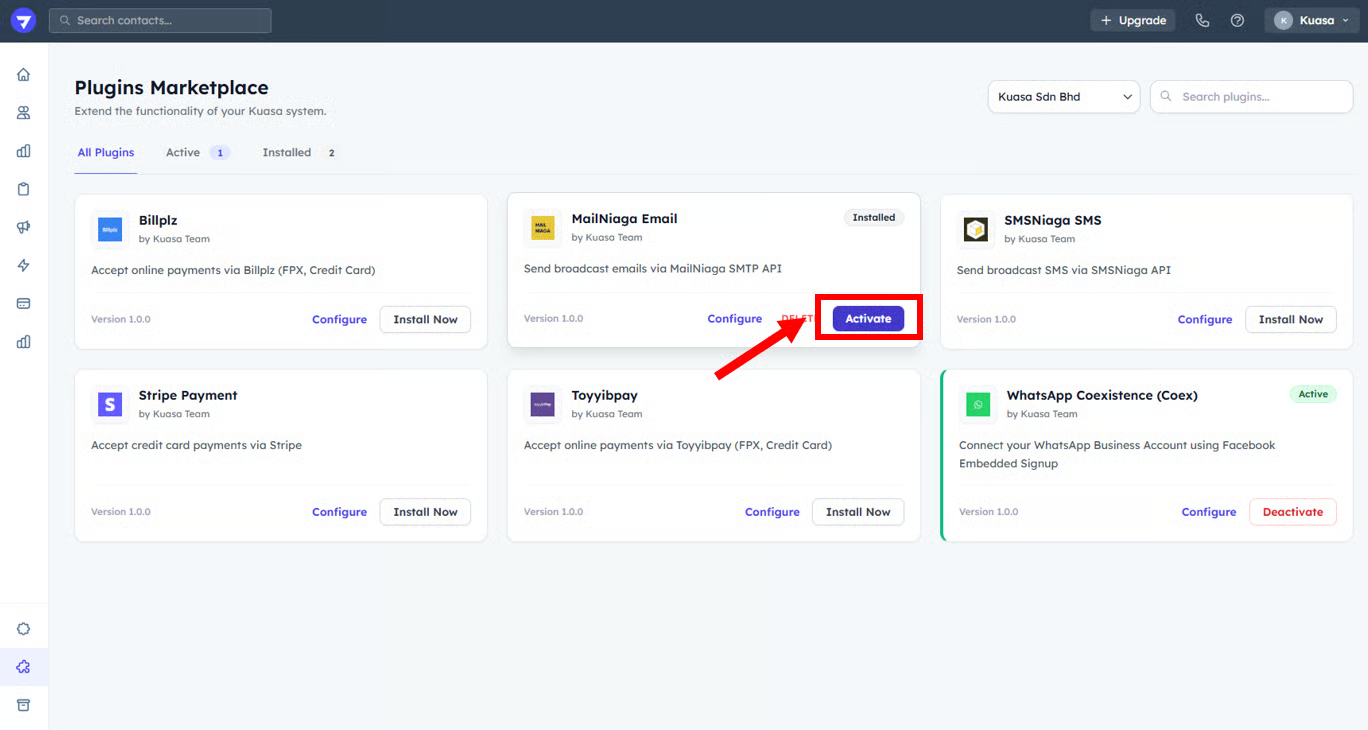
4. After it's already installed, click **Activate**.
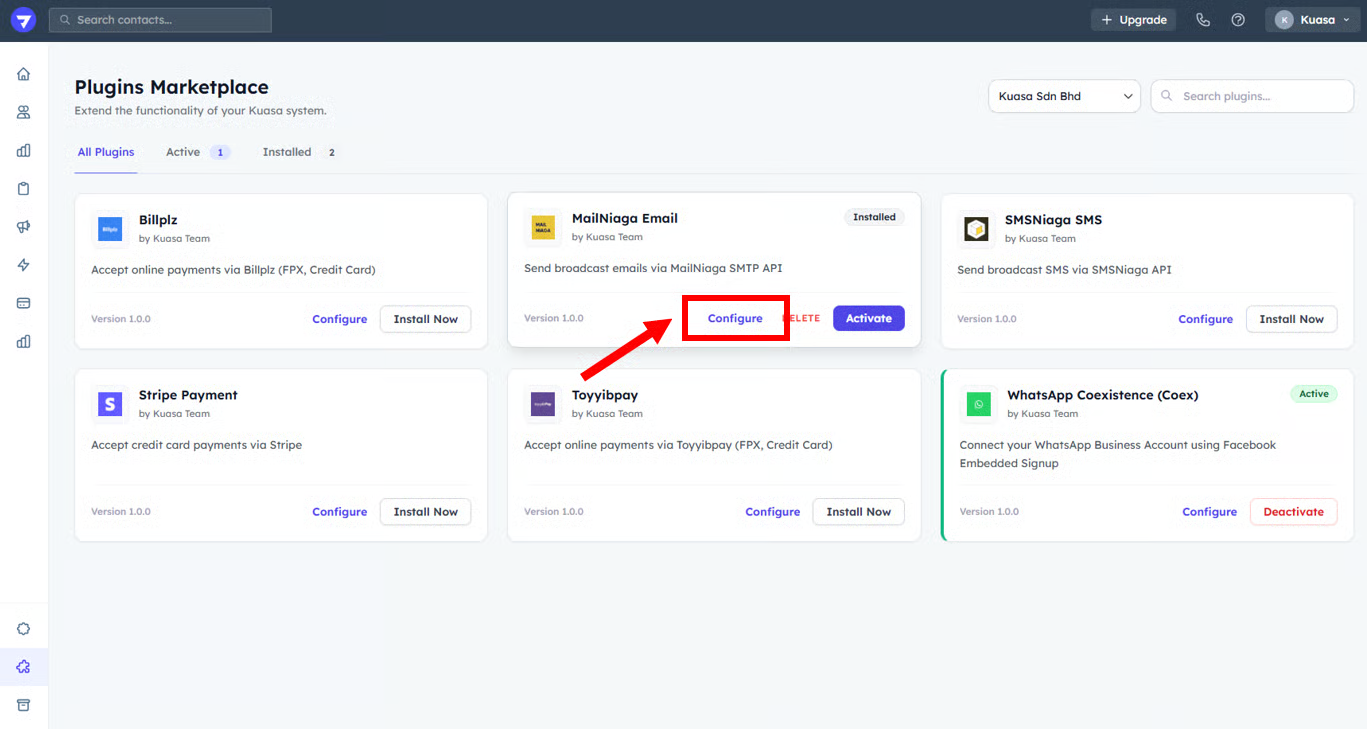
5. Then, click **Configure**.
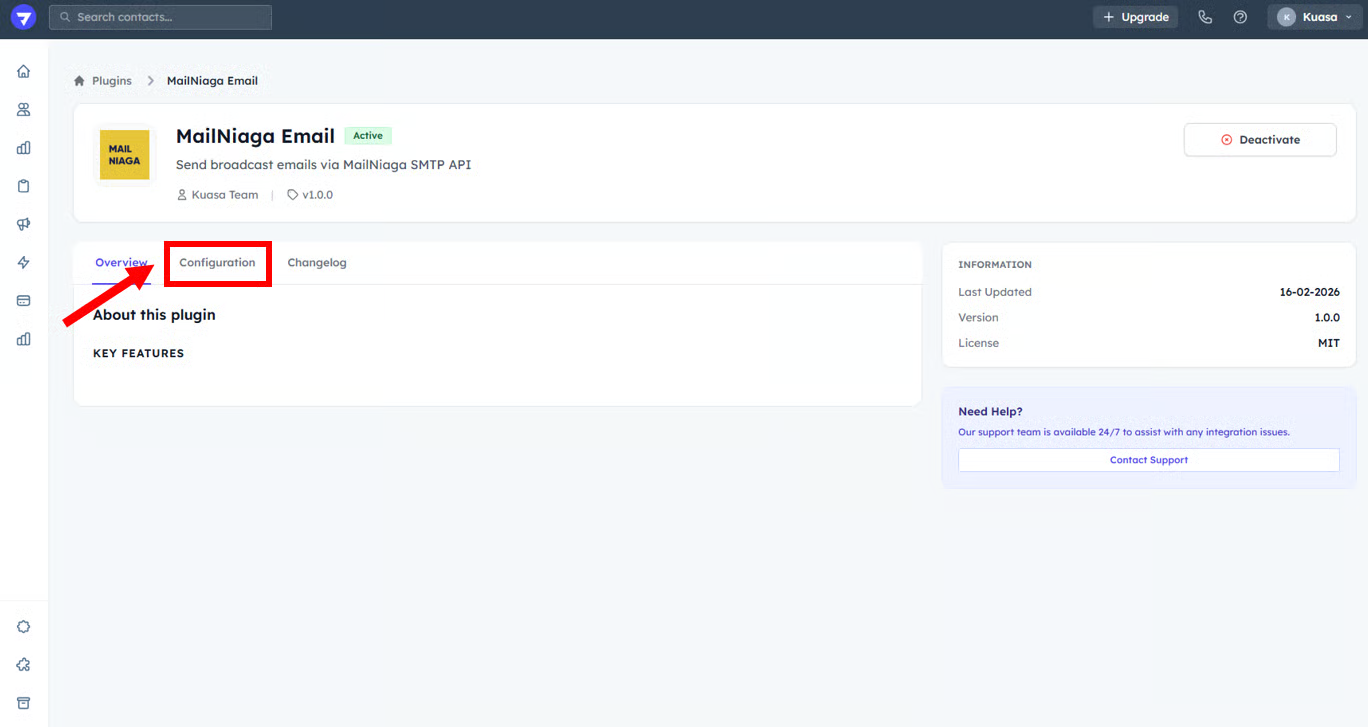
6. Go to **Configuration**.
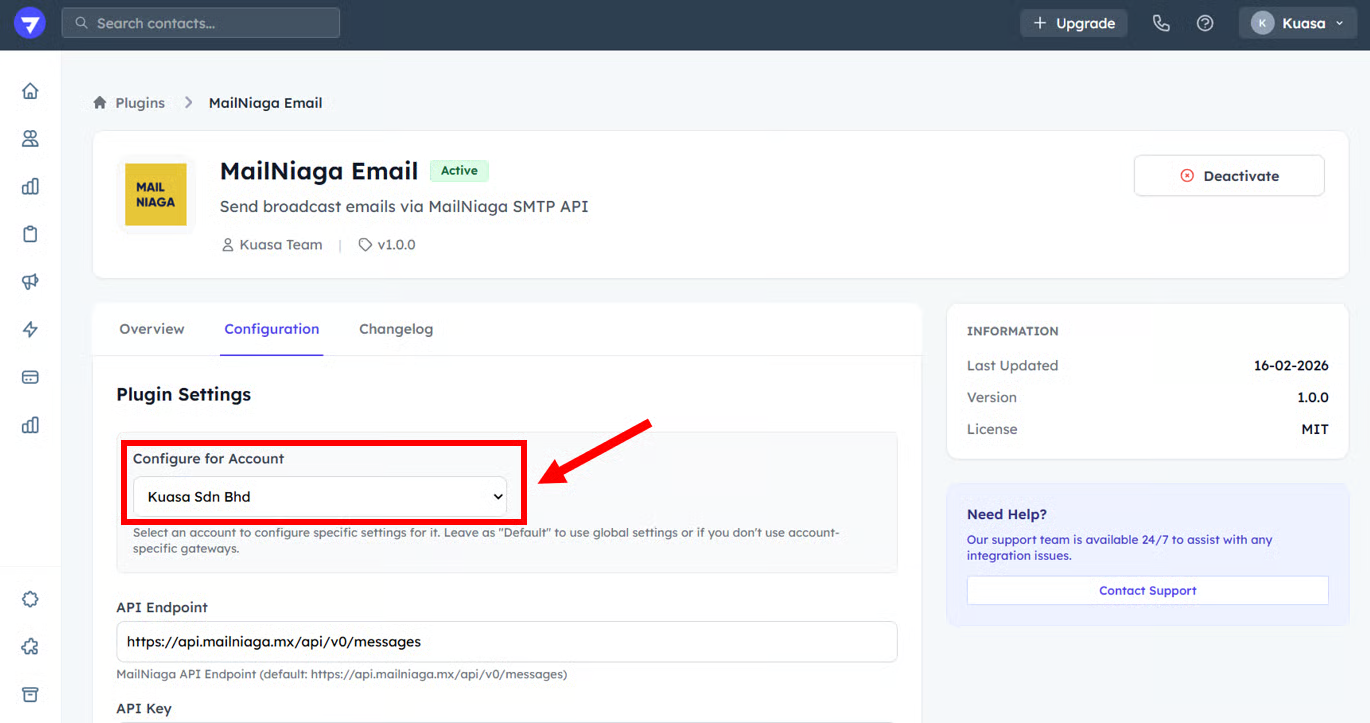
7. Choose the Client Account.
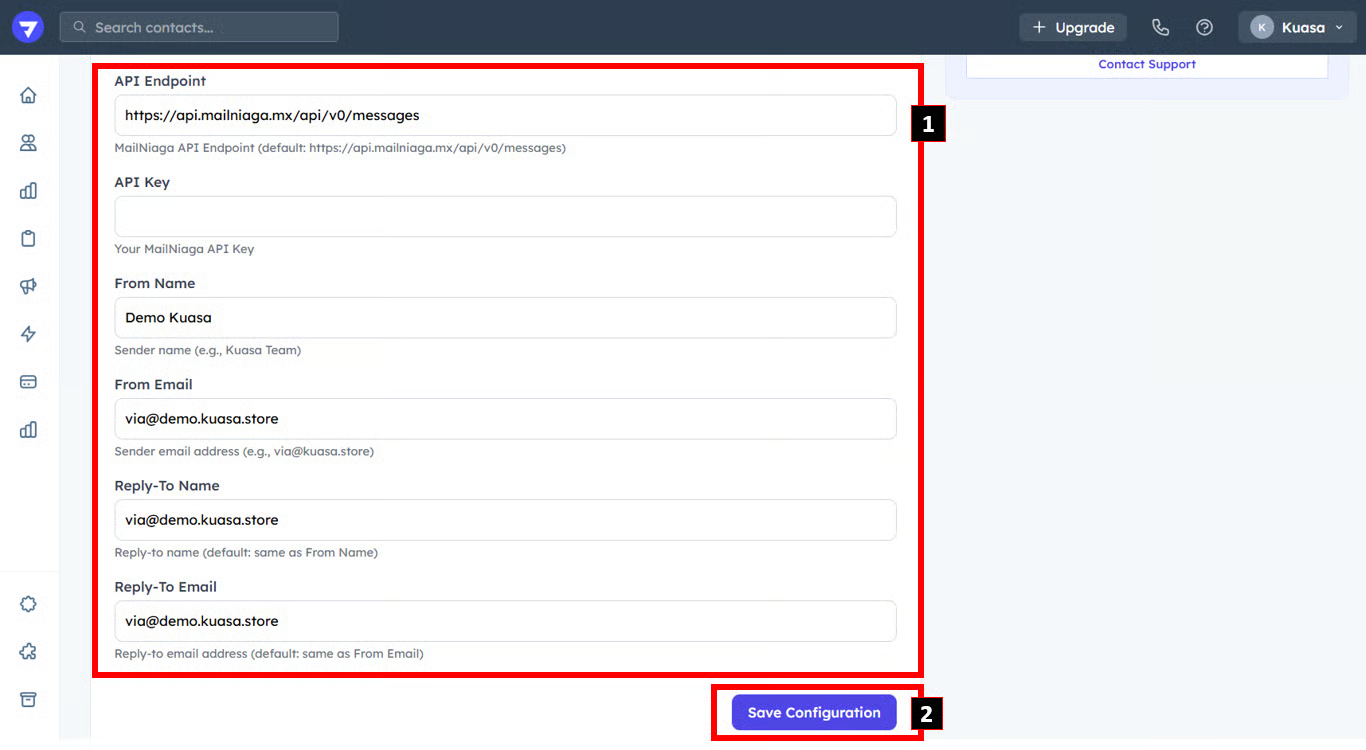
8. Enter all the details required:
* API Key (Your MailNiaga API Key)
* From Name (Sender name)
* From Email (Sender email address)
* Reply-To Name
* Reply-To Email
{% hint style="info" %}
#### To get the MailNiaga API Key, please follow below steps.
{% endhint %}
* Go to MailNiaga login page:
* Enter email address & password. Then, click **Sign In** to log in to the system.
* Click **SMTP**. Then, click any area of your SMTP account details.
**Copy** API Key as shown in the picture below.
{% hint style="success" %}
MailNiaga API Key successfully obtained
{% endhint %}
After done entering all the details. Click **Save Configuration**.
{% hint style="success" %}
Well Done! You already complete email plugin setup.
{% endhint %}