> For the complete documentation index, see [llms.txt](https://docs.kuasa.io/llms.txt). Markdown versions of documentation pages are available by appending `.md` to page URLs; this page is available as [Markdown](https://docs.kuasa.io/manage-data/import-contacts-manual-entry-vs.-csv-import.md).
# Import Contacts: Manual Entry vs. CSV Import
1. Go to to login to your Kuasa account.
2. Enter your **registered email & password**.
3. Click **Sign In** **to Account.**
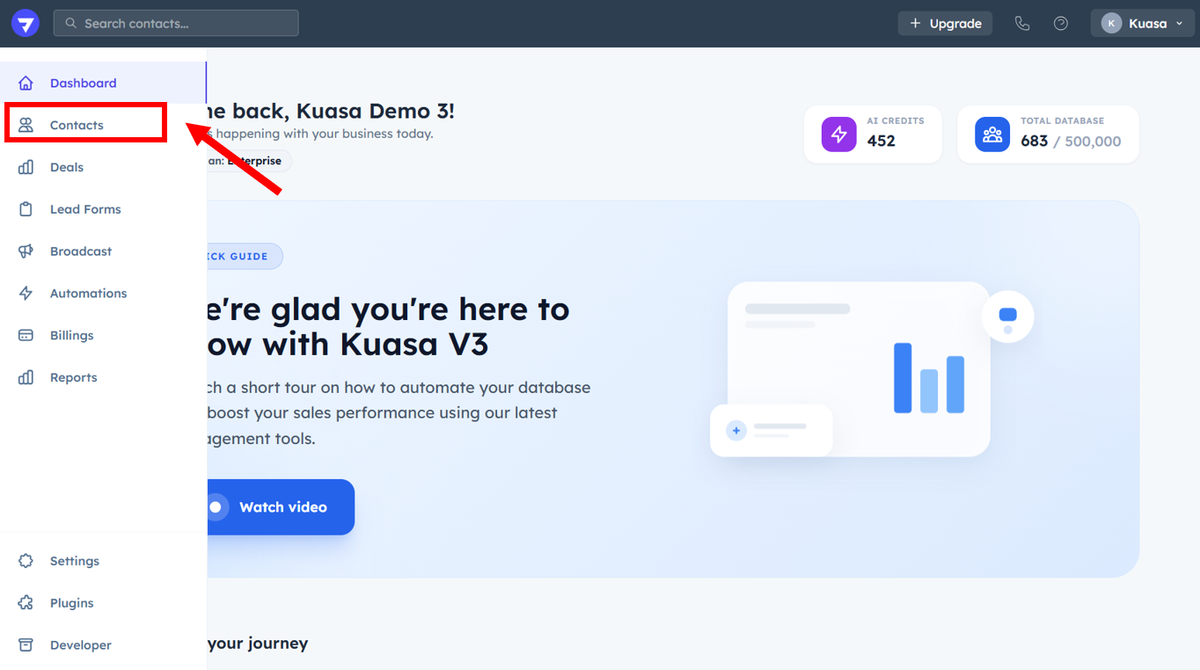
4. Click **Contacts**.
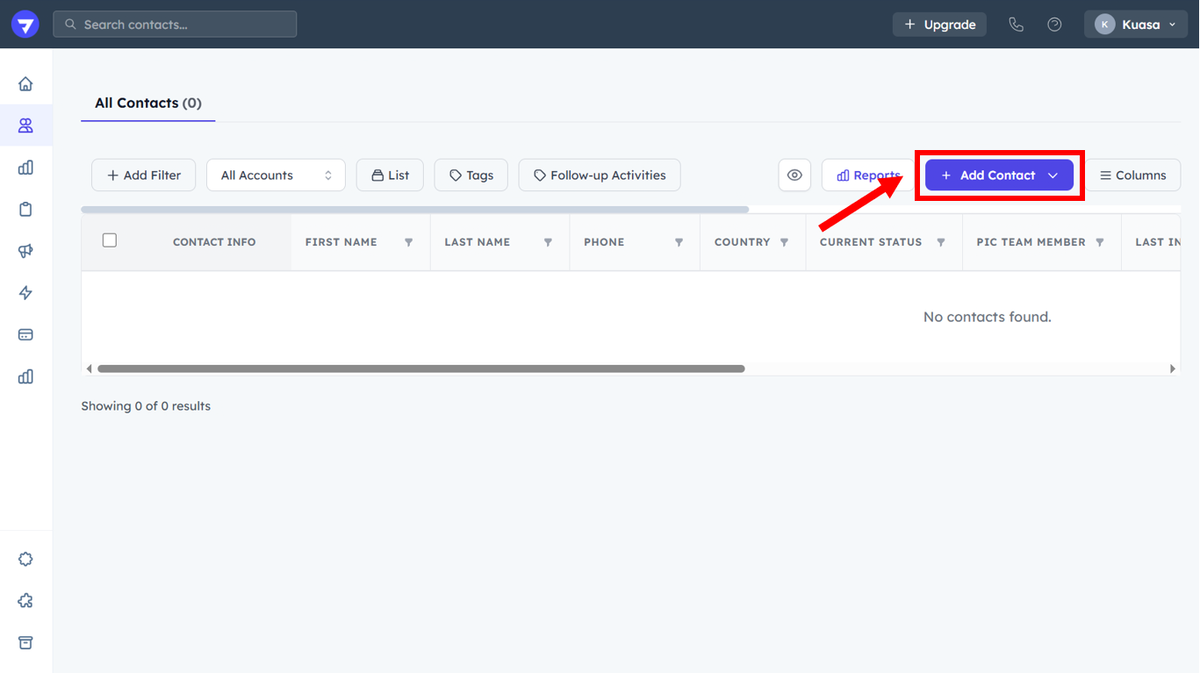
5. Click **Add Contact.**
**Add Contacts Manually**
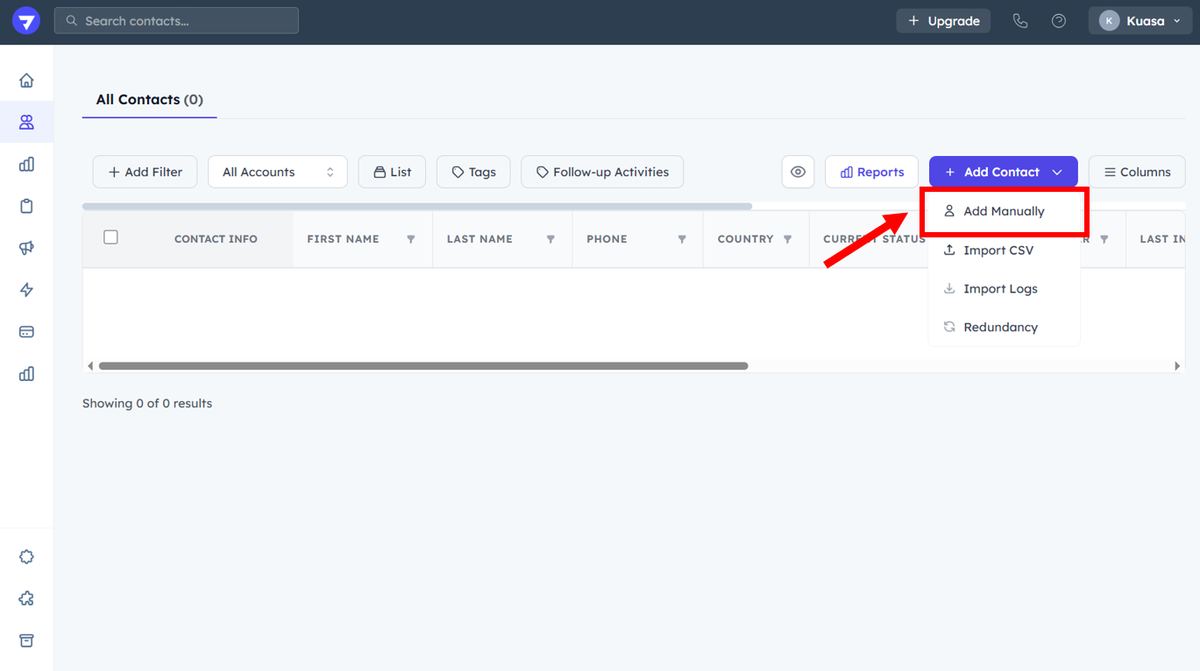
1. Click **Add Manually**.
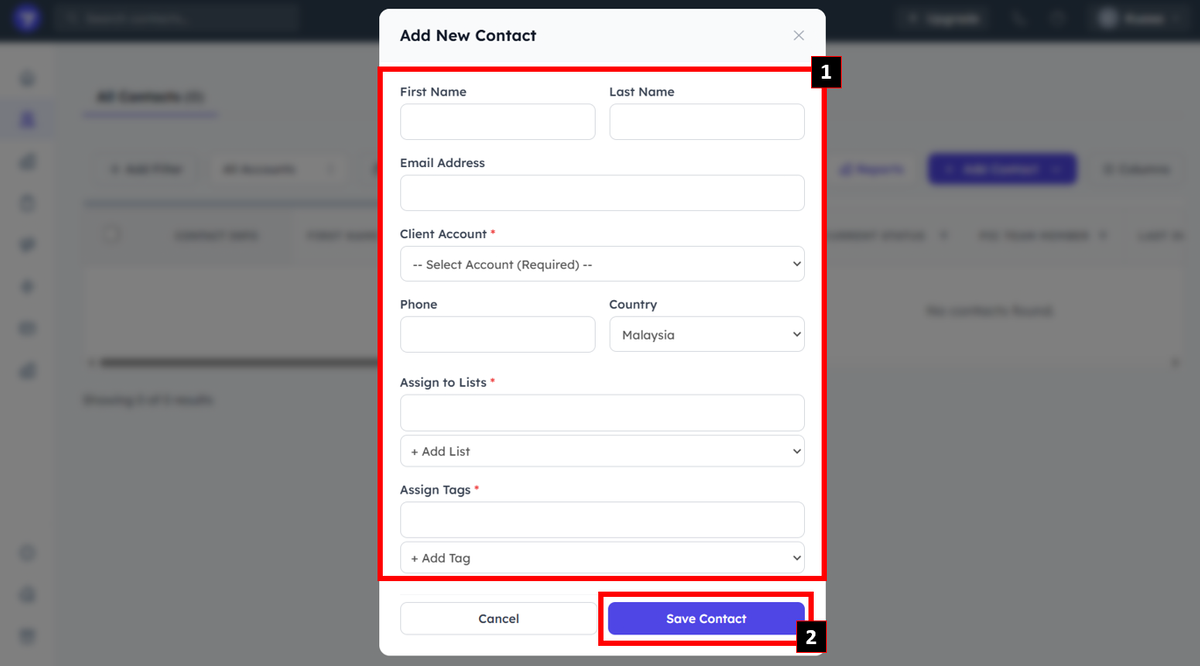
* Enter First Name, Last Name, Email Address.
* Select the **Client Account**.
* Enter phone number & select the country.
* Assign List & Tag to the contact.
{% hint style="warning" %}
Make sure to add the List & Tag before adding contacts
{% endhint %}
Click **Save Contact**.
#### **Add Contacts using CSV File**
1\. For your CSV file:
* Make sure the first row contains complete details, as the system will detect the number of columns based on the data in the first row.
* Make sure to save your Excel file in CSV (Comma delimited) format.
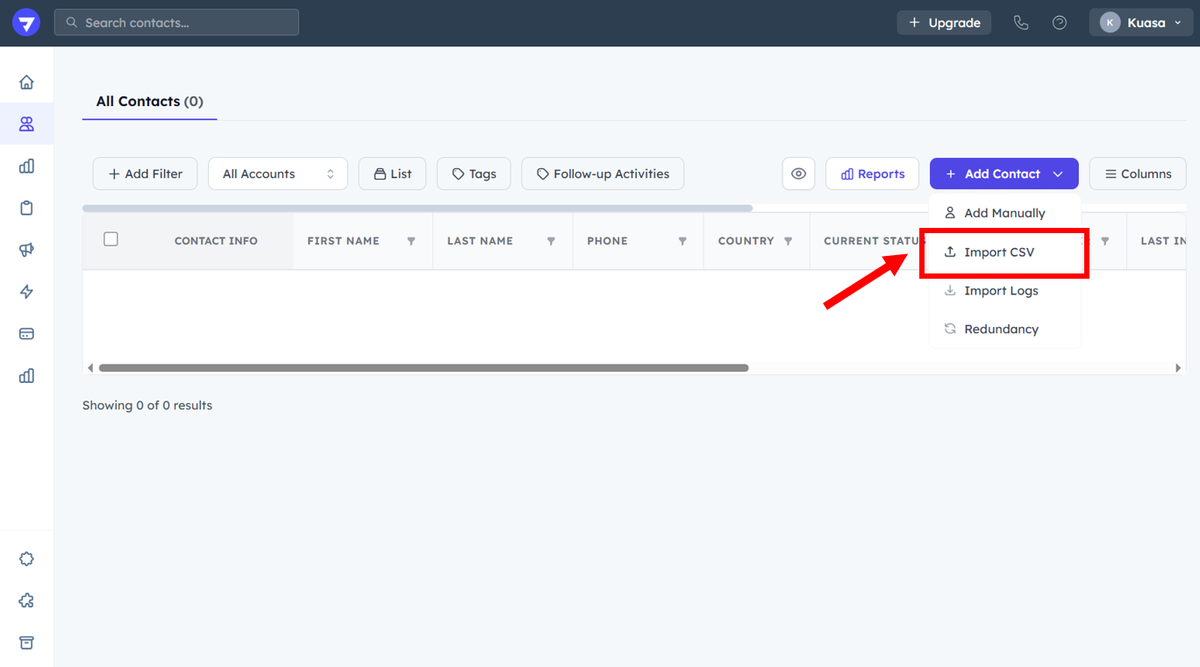
2. In Kuasa, click **Import CSV**.
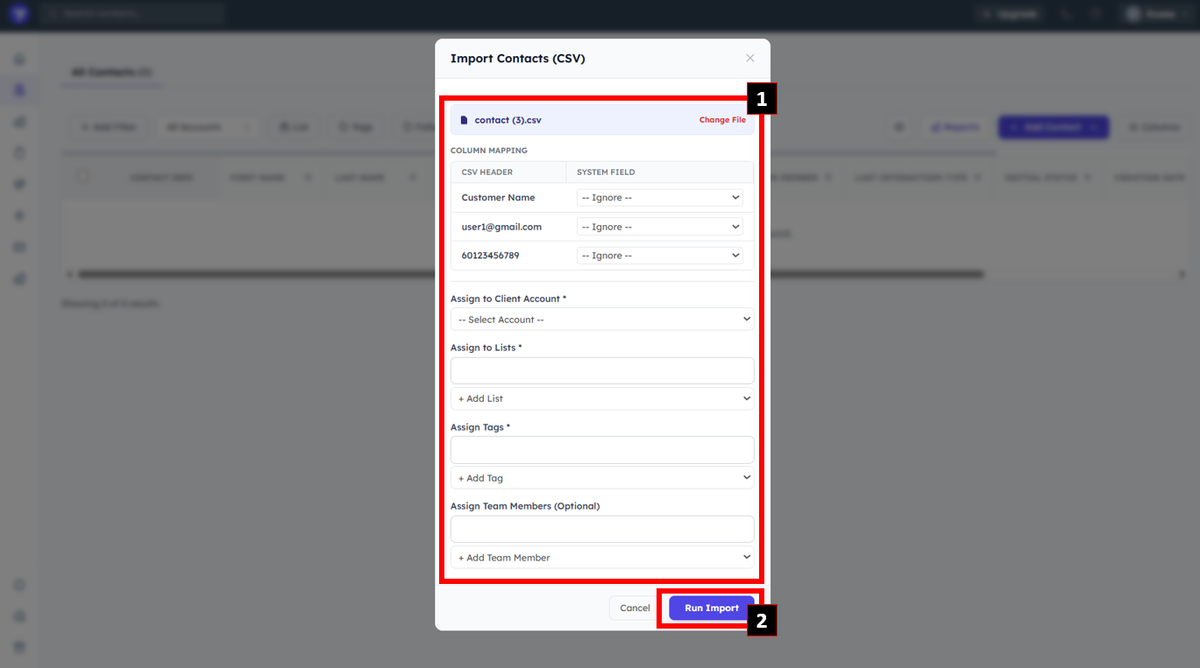
* Upload contacts CSV file.
* Set the **field type** for CSV header.
* Select **Client Account**.
* Select **List** & **Tag**.
* Click **Run Import**.